Er dere klare for ett laaaaaaaaaangt innlegg?!
Med 30 bilder *dåne* og en haug med skravling!! *Dåne litt til*
Men før jeg begynner,så vil jeg bare si Tusen hjertelig takk for alle tilbakemeldinger jeg har fått ang dress-kortet mitt *
glad og rørt*
Dere er noen skikkelige go`inger *
klem*
Klar,ferdig,gå!
**********************
Are you ready for a loooooooong post?!With 30 pics and lots of prattle(not sure if this is spelled right?!)!!But before i go on,i just wanna say Thank you so much for all the nice feedback and comments about my jacket-card *warms my heart*You`re the kindest *Hug*Ready,steady,go!
Vi begynner med det som skal bli skjorten :)
Jeg har brukt beige kartong.
str; 10*29 cm.
Lag brettekant på 13 cm.
Brett i to,og lag brettekant 1,5 cm fra toppen (den som er lengst)
**************
Lets begin with the shirt :)I have used a beige cardstock.Size; 10*29 cm.Make a fold at 13 cm.Fold it in two,and make a fold at 1,5 on the top (the longest part)

Klipp inn på hver side ca 3,5 cm.
Og ca 0,5 cm ned,så du får ett hakk.
***********
Cut in on both sides ca 3,5 cm.And about 0,5 cm down,to form a notch(?spelling...?)
Sånn :)
*********
Like this :)

Brett så kragen ned,på skrå mot midten.
Skjorta er ferdig :)
*************
Fold the collar diagonally to the middle.
You`re shirt is finished :)

Så over til jakken :)
Brun kartong i str; 13,5*23 cm
Lag brettekant på 5,5 på ene siden og 6,5 på andre siden.
*****************
So over to the jacket :)
Brown cardstock in size 13,5*23 cm.
Make folds at 5,5 on one side and on the other side 6,5 cm.

Rund hjørnene på toppen.
***********
Round the corners on top.

Brett jakkeslagene.
På den ene siden,vil jakkeslaget bli for stort,så klipp det til ;)
*************
Fold the jacket-layers (i am googling ;) )
You have to trim one of the layers,it will be to big.
So just trim it down a bit ;)

Her har jeg klipt til mitt jakkeslag :)
************
Here i have trimmed my jacket-layer :)
Så er det lommer.
Du trenger; 2 stk i str 1*3 cm og 1 stk på 1*2 cm.
Svamp alle kanter med distress ink vintage photo.
Klipp til "tørkle" og lim det på den lille biten.
Lim alle lommene på plass.
***************
Then we need pockets.
Cut out 2 pieces in 1*3 cm and 1 piece at 1*2 cm.
Distress all edges with vintage photo.
Cut out a beige cardstock and make a tissue.
Glue it on the back of the little piece.
And attached all the pockets on the jacket.

Lim på magneter på jakken.
**********
Glue on some magnets on the jacket.

Lim på knapper :)
***********
Glue on some buttons :)
Så var det vesten :)
Jeg bruker skjorta som mal,og tegner opp på vanlig kopipapir før jeg klipper ut vesten i mønsterpapiret.
***************
Then we need a vest :)I use the shirt as a template,and make the vest on printerpaper first.Then when i think it looks ok,i cut it out on DP. Så trengs en strimle med papir.
Ca 1 cm bred.
Festes på vesten,men bare i øvre og nedre kant!!
****************
Cut out a stripe with paper. 1 cm.
Glue it on the vest,but only on top and bottom!!
 Fest på knapper.
Og lag lommer. (Samme mål som på jakken)
***************
Attached some buttons.
And some pockets. (Same size as on the jacket)

Skjær i lommenes øvre kant.
*************
Make a hole in the pocket.


Og slik ble lomme-uret til ;)
***********
Home-made pocket-watch ;)Vesten festes til skjorten med 3D-puter.
Fest lenken til lomme-uret under papir-strimlen.
***************
The vest is attached to the shirt with 3D-tape.
Attach the chain under the paper-strips.

Slipset/tørkle er ett bredt silkebånd.
Festes på baksiden av selve kartongen.
Stikk pyntenålen igjennom slips og kartong,og festes på baksiden.
**************
The tie is a silk-ribbon.
Attach it on the back of the cardstock.
Put the diamond pin thru the tie and cardstock and glue it on the back.

Sånn ;)
*****
Like this ;)

Kutt til en kartong bit i str 10*13 cm og festes oppå slipsfestet.
***********
Cut a cardstock in 10*13 cm and glue it on top of the tie-ends.

Renklipp kantene.
***********
Trim the edges.

Fest magneter på kragen og under slipset.
Og da er du ferdig!!
Fest skjorten til jakken,og du kan pynte innsidene dine som du ønsker :)
***********
Attache magnets on the edges of the collar and under the tie.
And then you are finished!!
Attache the shirt to the jacket,and you can decorate you`re insides :)

Mitt dress kort :)
********
My jacket card :)
Vesten :)
******
The vest :)
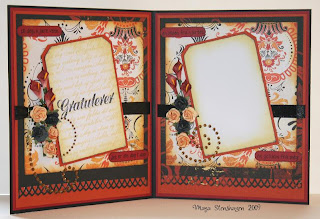
Og min ferdig dekorerte innside :)
***********
And my finished inside :)
hÄngelen er malt med distress ink refiller.
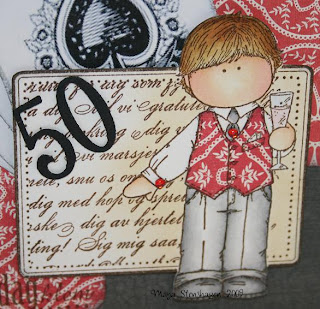
Og for anledningen er hjertet byttet ut med ett hjemmelaget skilt :)
**************
The hÄngel is coloured with distress ink refills.And his heart is removed and a home-made sign is attached instead :)
Gratulasjons tekst fra Elsi :)
Er dere fortsatt med?!
WOW om dere er ;)
Håper det var noenlunde forståelig (kanskje litt t-skje forklaringer...)
Men om dere lurer på noe,så er det bare å spørre!!
Klemmer fra Maya :) (Som har skrivekrampe *fnis*)
**********
Text from Elsi :)
Are you still with me?!
WOW if you do ;)
Hope it was understandable,and if you`re having any questions,just ask!
Hugs from Maya:)


