
God fredag!
Her kommer jeg med enda en sjokolade eske,
og denne gangen med nye stempler fra hÄnglar & Wings ♥
Har du sett alle de nye fine stemplene?
************
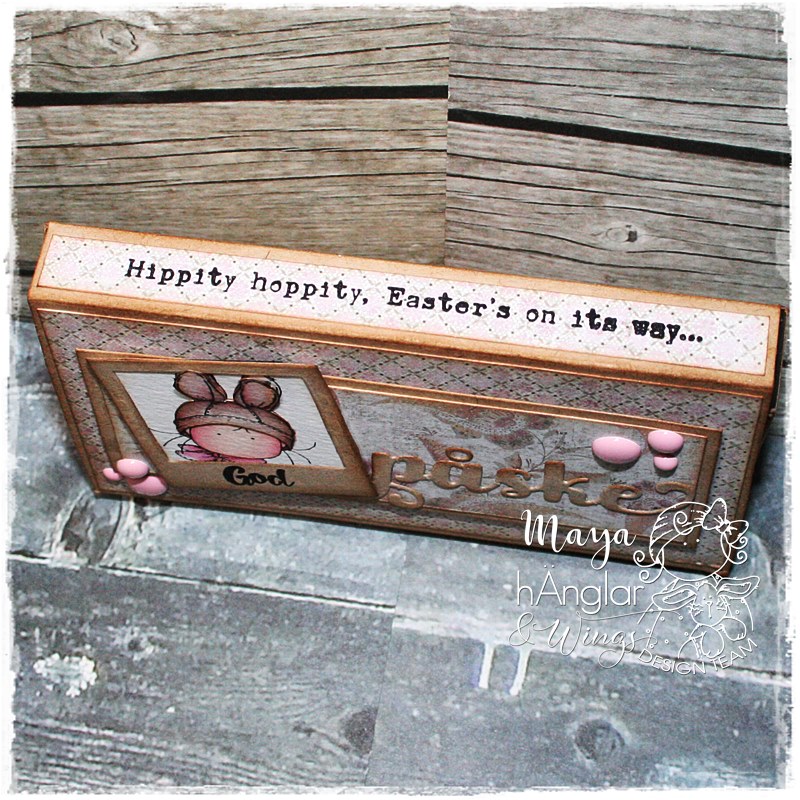
Happy Friday!
Here I come with another chocolate box,
and this time with new stamps from hÄnglar & WIngs ♥
Have you seen all the new stamps?
Have you seen all the new stamps?


Se på den søte lille haren da!!
Stempler brukt på esken;
***************
Look at that cute bunny!!
Stamps used on the box;


Jeg fikk spørsmål om jeg hadde en steg for steg med esken,
og det har jeg laget :)
Håper du vil prøve!
****************
I got a question if I had a template/tutorial for the box,
and I have made one :)
Hope you will try it out!

Start med kartong i størrelse 18 x 24 cm
**************
Start with a cardstock in size 18 x 24 cm

Preg på 1,5 og 3 cm på begge sider
***********
Make a fold on 1,5 and 3 cm on both sides.

Snu arket,
og preg på 7 - 8,5 - 15,5 - 17 cm
*************
Turn the paper,
and make folds on 7 - 8,5 - 15,5 - 17 cm

Klipp vekk, så arket blir seende slik ut.
************
Cut off the corners, so the paper look like this.

Jeg brukte en kant punch på ene siden.
************
I used a edge punch on one of the sides.

Så merket jeg med blyant,
der hvor pyntekanten går opptil.
************
The I marked where the edge came.

Kutt på skrå.
**************
Cut an angle.

Da vil du få en pen avslutning.
************
Then you will get a pretty edge.


Lim på kanten.
***********
Glue on the fold.

Og der har du esken ferdig!
Ha en flott og kreativ fredag :)
Klem, Maya
*************
And there you have the box finished!
Have a wonderful and creative Friday :)
Hugs, Maya


1 kommentar:
Gorgeous chocolatebox you made Maya, very pretty!
And thank you for the tutorial, it's a nice present for someone to give to!
Ha en flott helg. 🙂
Hilsen, Wilma.
Legg inn en kommentar